The Enduring Appeal of Washer Nail Polish Jewelry: A Creative and Sustainable Craft
Related Articles: The Enduring Appeal of Washer Nail Polish Jewelry: A Creative and Sustainable Craft
Introduction
With enthusiasm, let’s navigate through the intriguing topic related to The Enduring Appeal of Washer Nail Polish Jewelry: A Creative and Sustainable Craft. Let’s weave interesting information and offer fresh perspectives to the readers.
Table of Content
The Enduring Appeal of Washer Nail Polish Jewelry: A Creative and Sustainable Craft
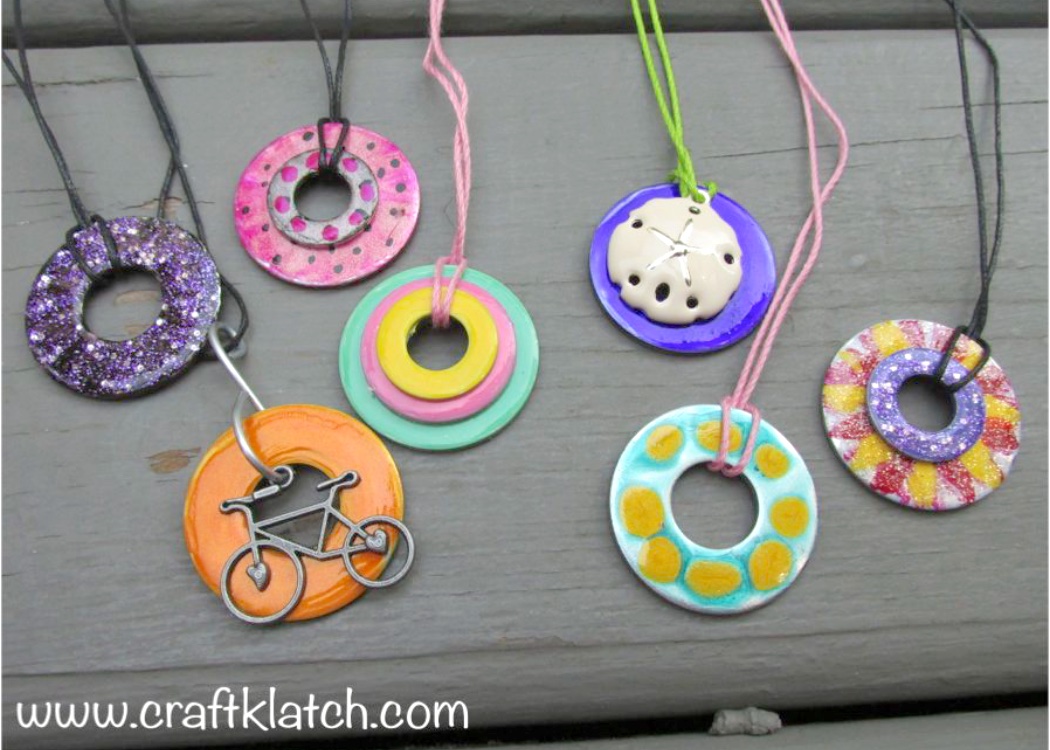
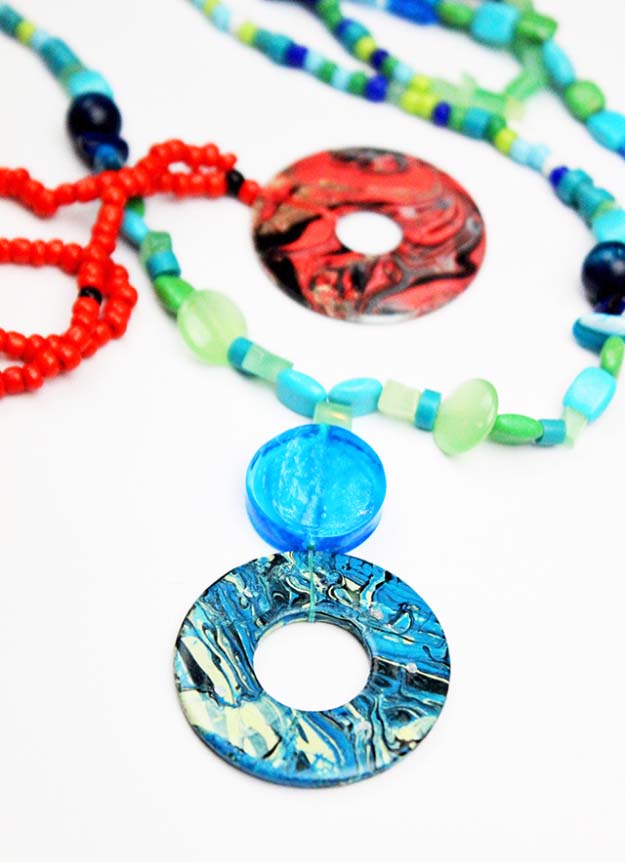
In the ever-evolving realm of DIY crafts, washer nail polish jewelry has emerged as a captivating and accessible art form. This technique, which involves adorning washers with vibrant nail polish designs, offers a unique blend of practicality, affordability, and creative expression.
A Fusion of Function and Fashion:
Washers, typically associated with industrial applications, are transformed into eye-catching adornments through the artful application of nail polish. This unexpected pairing underscores the inherent beauty found in everyday objects, fostering a sense of creative ingenuity.
A Sustainable Approach to Jewelry Making:
The use of recycled washers contributes to a more sustainable approach to jewelry creation. By repurposing these readily available materials, individuals can reduce their environmental impact while indulging in a fulfilling artistic pursuit.
A Versatile Canvas for Creative Expression:
The smooth surface of washers provides an ideal canvas for intricate nail polish designs. From geometric patterns and abstract swirls to delicate floral motifs and bold color gradients, the possibilities are endless.
An Accessible and Affordable Craft:
Washer nail polish jewelry is a highly accessible craft, requiring minimal materials and tools. The affordability of washers and nail polish makes it a budget-friendly option for crafting stunning jewelry pieces.
A Journey of Exploration and Experimentation:
This craft encourages experimentation and exploration. Individuals can experiment with different nail polish colors, textures, and techniques to create unique and personalized pieces.
A Gateway to Personalized Style:
Washer nail polish jewelry allows individuals to express their personal style through customized designs. Whether creating statement earrings, charming bracelets, or unique necklaces, each piece reflects the wearer’s individuality.
The Allure of Uniqueness:
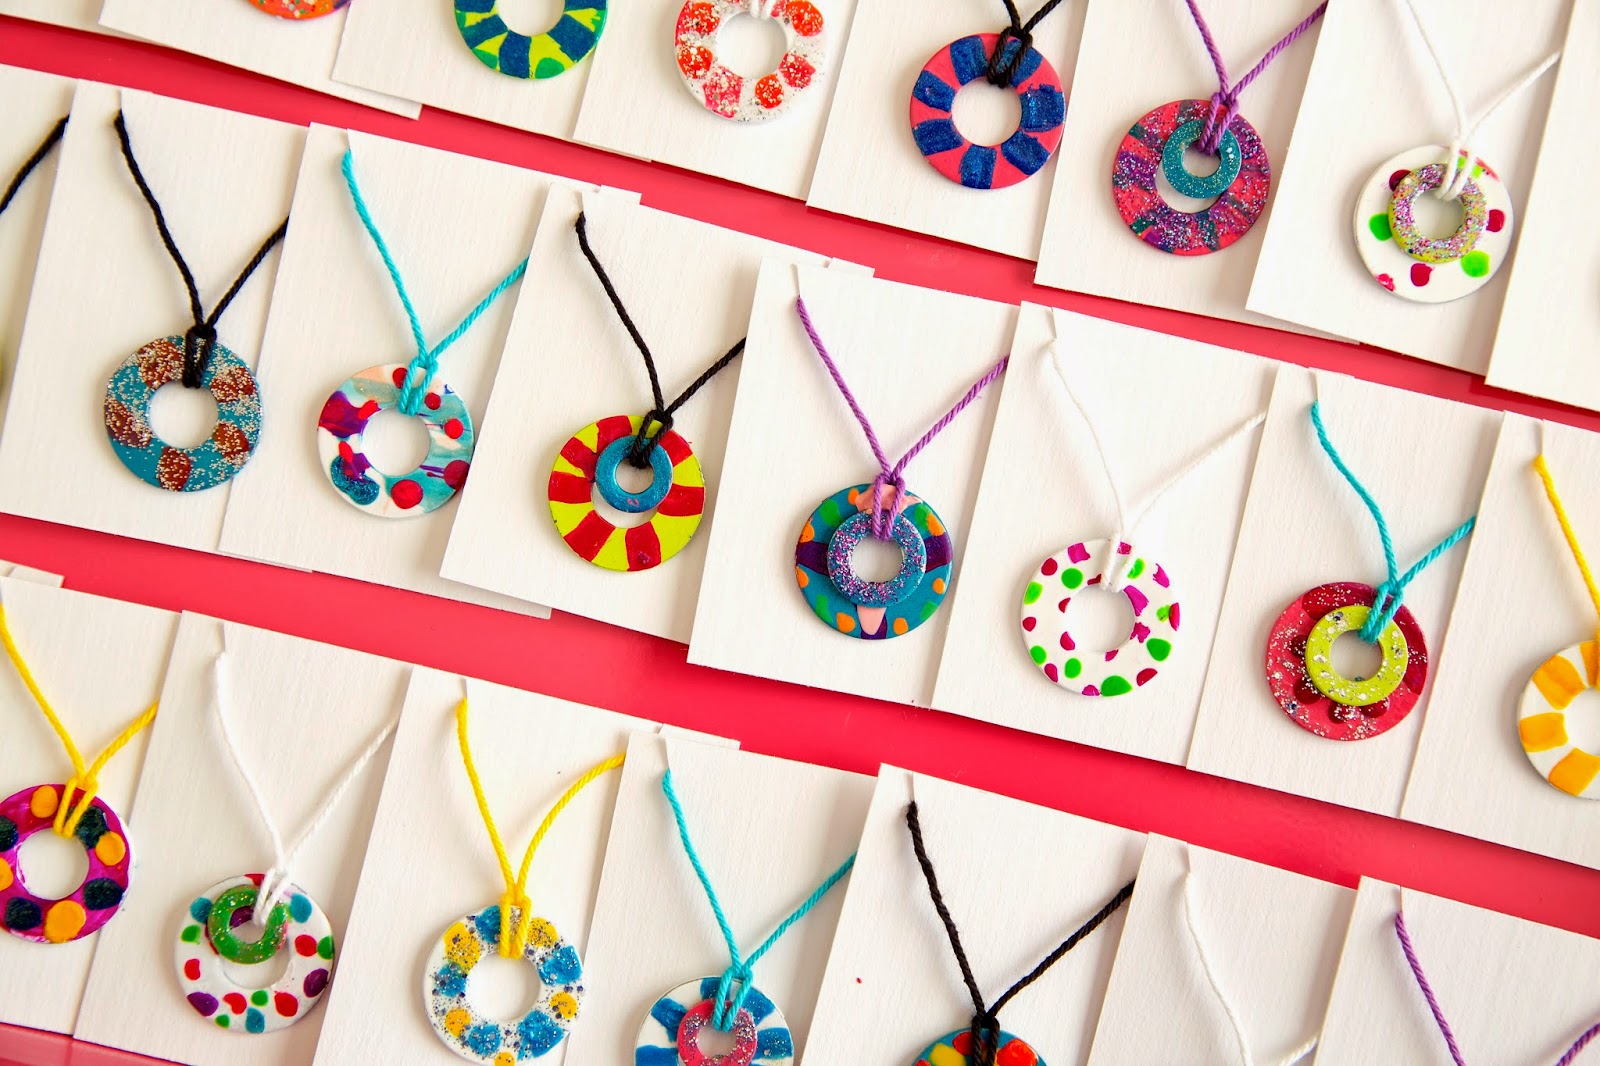
The handcrafted nature of washer nail polish jewelry ensures that each piece is one-of-a-kind. This uniqueness adds a special touch to any ensemble, making it a cherished and treasured possession.
The Enduring Appeal of Upcycling:
The upcycling of washers into jewelry pieces highlights the potential for transforming discarded materials into beautiful and functional objects. This practice promotes a mindful approach to resource utilization.
A Journey of Discovery and Self-Expression:
The process of creating washer nail polish jewelry fosters a sense of creativity and self-expression. It provides a platform for individuals to explore their artistic talents and discover their unique style.
A Bonding Experience:
Washer nail polish jewelry can be a delightful activity for individuals of all ages and skill levels. It can be enjoyed as a solitary pursuit or as a shared experience with friends and family.
A Celebration of Creativity:
The vibrancy and individuality of washer nail polish jewelry serve as a testament to the power of creativity. It reminds us that beauty can be found in unexpected places, and that the art of crafting can be a source of joy and self-discovery.
Exploring the Different Techniques of Washer Nail Polish Jewelry:
1. Simple Swirls and Patterns:
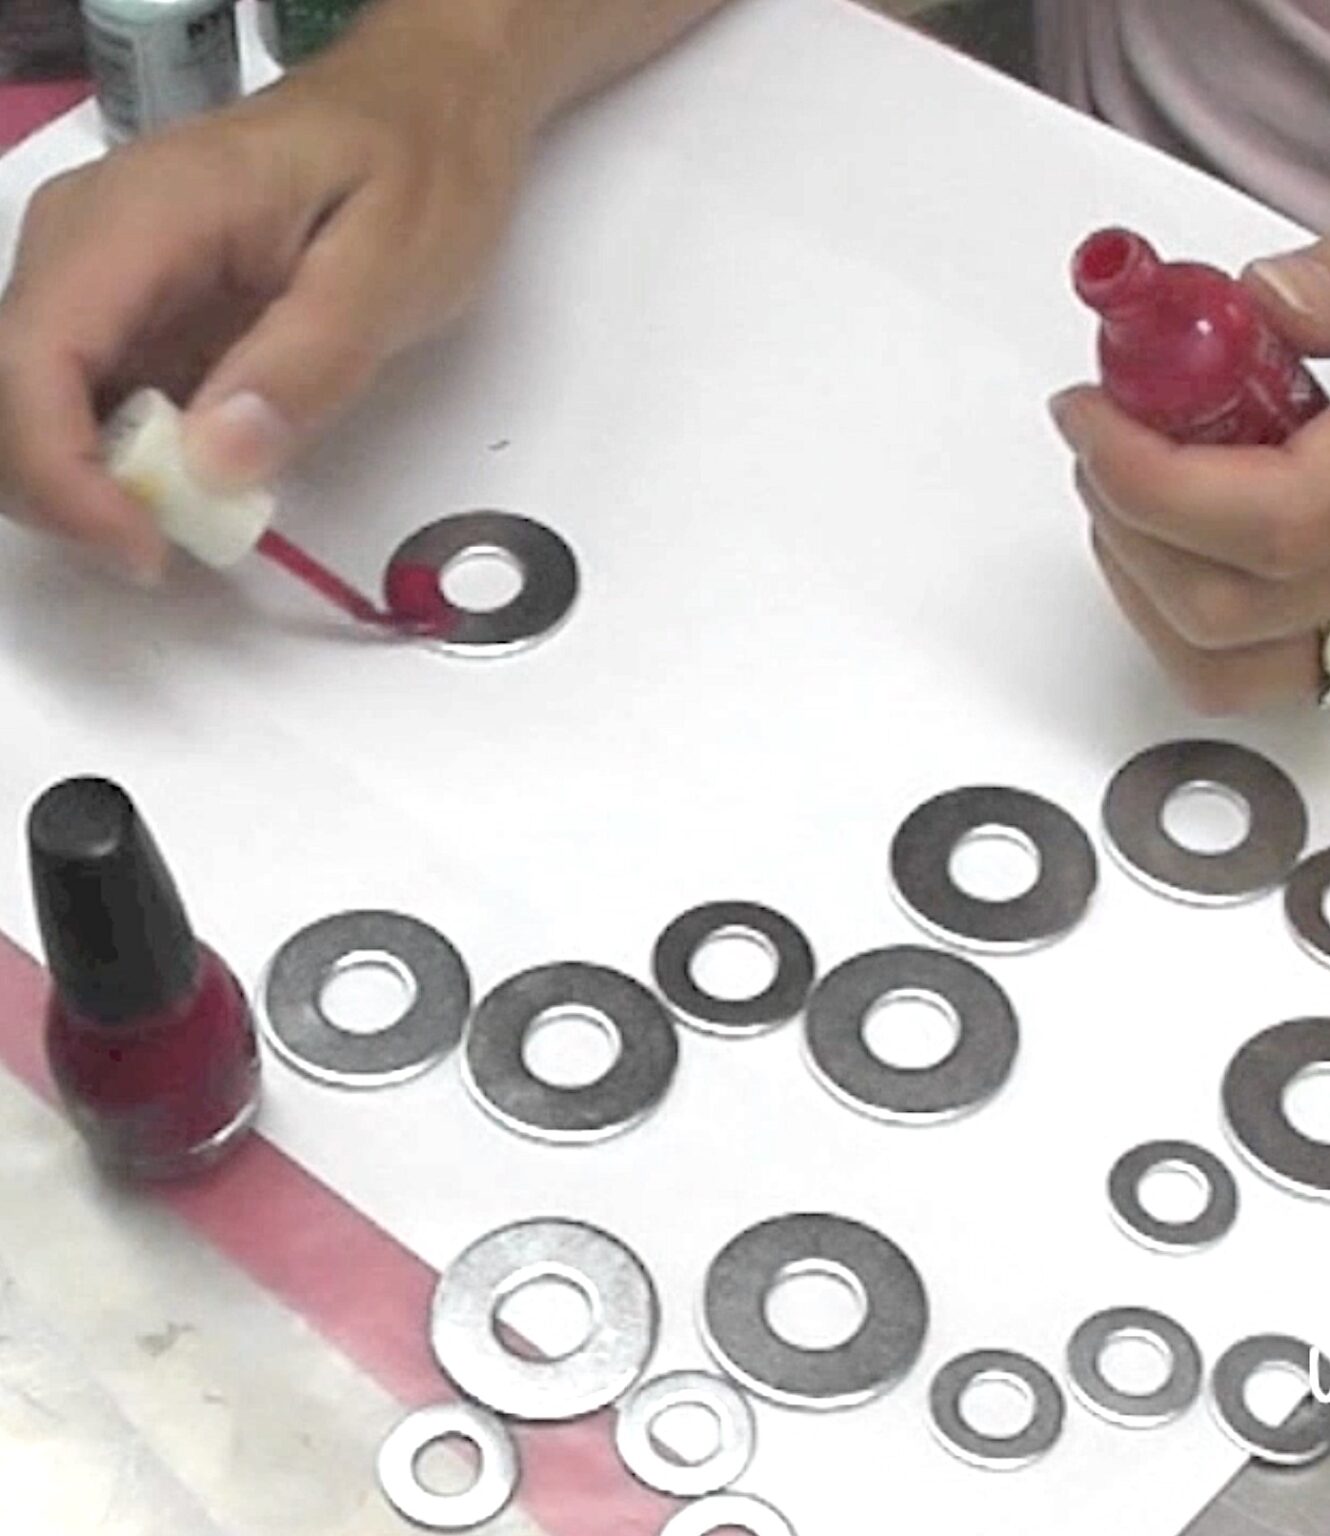
- Materials: Washers, nail polish in various colors, toothpick or thin brush.
-
Process:
- Apply a base coat of clear nail polish to the washer.
- Choose a color and carefully apply a thin layer of nail polish to the washer’s surface.
- Use a toothpick or thin brush to create swirls, lines, or dots on the wet nail polish.
- Allow the design to dry completely before adding another color or layer.
2. Geometric Designs:
- Materials: Washers, nail polish in contrasting colors, tape, toothpick or thin brush.
-
Process:
- Apply a base coat of clear nail polish to the washer.
- Use tape to create geometric shapes on the washer’s surface.
- Apply nail polish to the exposed areas, leaving the taped areas blank.
- Carefully remove the tape while the nail polish is still wet to reveal the geometric design.
3. Ombre Effects:
- Materials: Washers, nail polish in gradient colors, sponge, toothpick or thin brush.
-
Process:
- Apply a base coat of clear nail polish to the washer.
- Dab a sponge into the lightest color of nail polish and apply it to the washer’s surface.
- Gradually blend in darker colors using the sponge, creating a smooth ombre effect.
- Use a toothpick or thin brush to blend the edges for a seamless transition.
4. Negative Space Designs:
- Materials: Washers, nail polish in contrasting colors, tape, toothpick or thin brush.
-
Process:
- Apply a base coat of clear nail polish to the washer.
- Use tape to create shapes or patterns on the washer’s surface.
- Apply nail polish to the exposed areas, leaving the taped areas blank.
- Carefully remove the tape while the nail polish is still wet to reveal the negative space design.
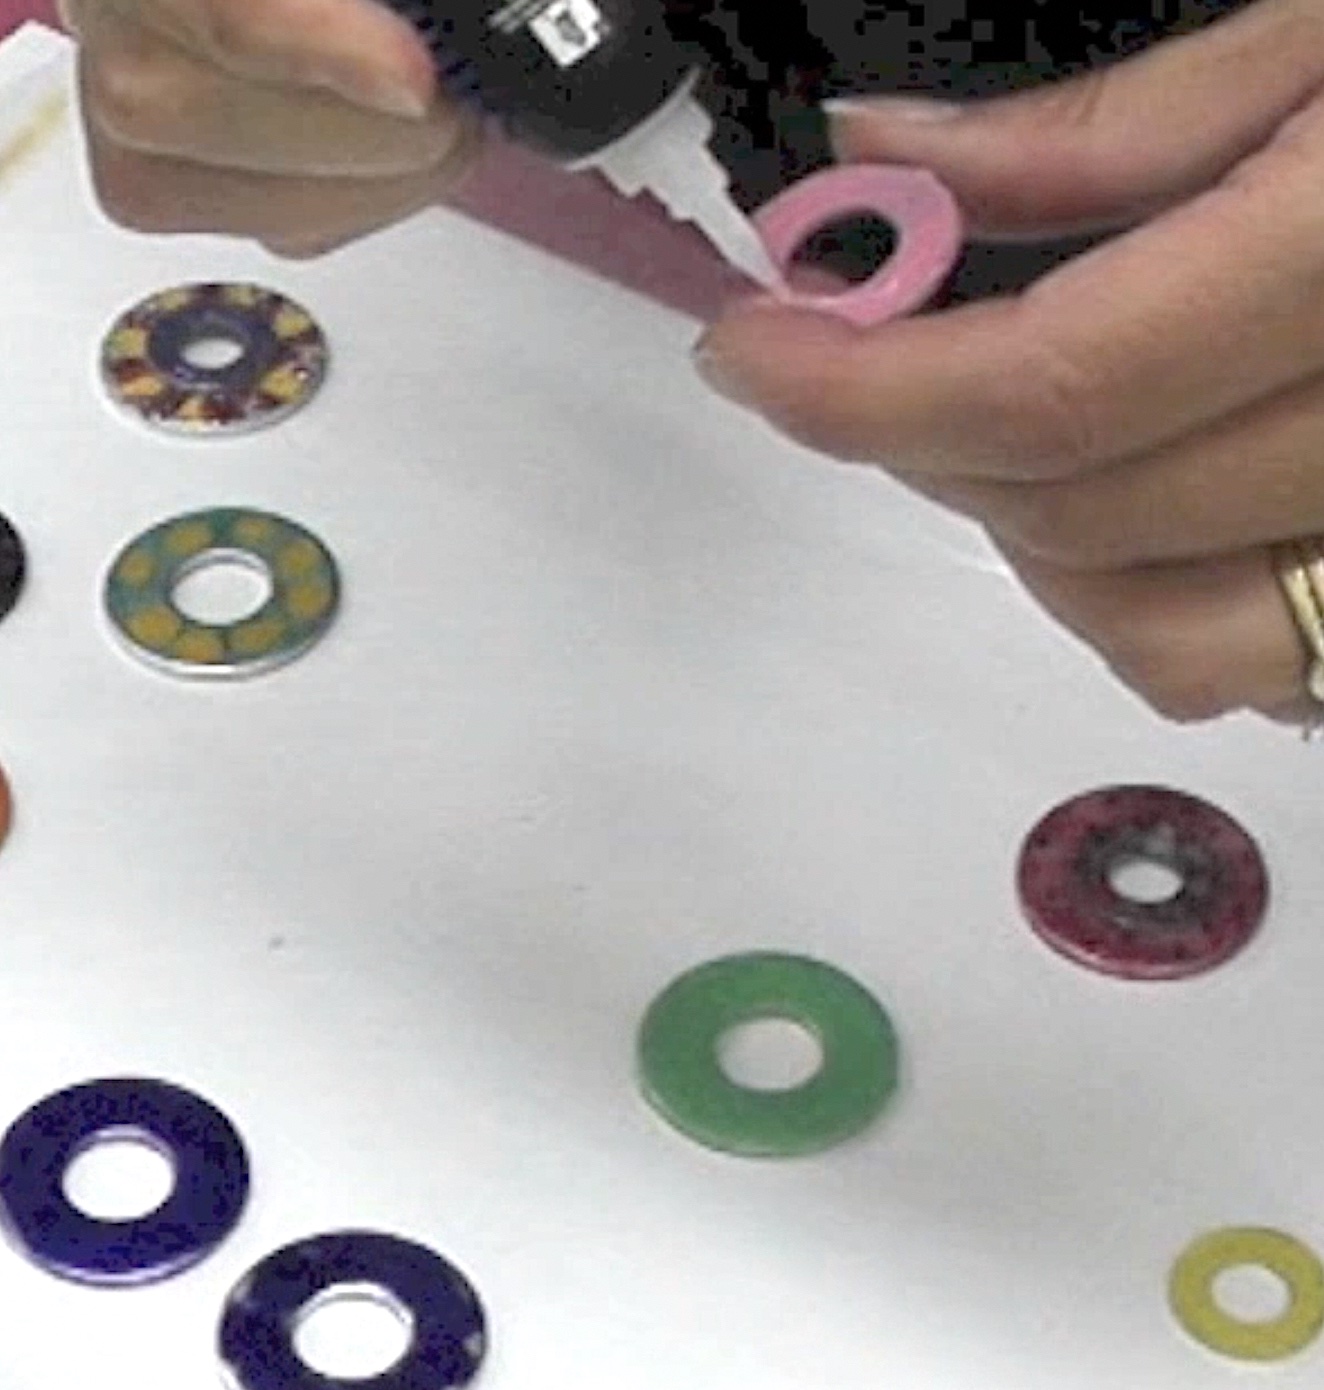
5. Embellished Designs:
- Materials: Washers, nail polish, glitter, rhinestones, glue, toothpick or thin brush.
-
Process:
- Apply a base coat of clear nail polish to the washer.
- Create a nail polish design on the washer’s surface.
- Once the design is dry, use glue to adhere glitter, rhinestones, or other embellishments to the washer.
- Allow the embellishments to dry completely before handling.
The Importance of Proper Sealing and Finishing:
After the nail polish designs are complete, it’s essential to seal them with a clear top coat. This step protects the designs from chipping, scratching, and fading, ensuring their longevity. A top coat also adds a glossy finish, enhancing the overall appearance of the jewelry.
Tips for Creating Stunning Washer Nail Polish Jewelry:
- Use a high-quality nail polish: Opt for nail polish that is known for its durability and vibrant colors.
- Apply thin coats of nail polish: Applying multiple thin coats is preferable to applying one thick coat, as it helps to prevent smudging and uneven coverage.
- Allow each coat to dry completely: Patience is key when working with nail polish. Ensure that each coat is fully dry before applying the next.
- Clean up any spills or smudges: Use a cotton swab dipped in nail polish remover to clean up any spills or smudges.
- Experiment with different techniques: Don’t be afraid to try different nail polish techniques to discover your own unique style.
- Add embellishments for extra flair: Incorporate glitter, rhinestones, or other embellishments to add a touch of sparkle and personality to your jewelry.
- Create a cohesive collection: Design a series of washer nail polish jewelry pieces that complement each other, creating a coordinated and stylish look.
- Share your creations: Show off your washer nail polish jewelry creations with friends and family, and consider selling them at craft fairs or online marketplaces.
FAQs about Washer Nail Polish Jewelry:
1. What types of washers can be used for jewelry making?
Any type of washer can be used for jewelry making, but washers made of metal or plastic are ideal due to their durability and smooth surfaces.
2. What kind of nail polish is best for washer jewelry?
High-quality nail polish that is known for its durability, vibrant colors, and smooth finish is recommended for washer jewelry.
3. How can I attach washers to jewelry findings?
Washers can be attached to jewelry findings using jump rings, wire, or glue.
4. How long does it take for nail polish to dry on washers?
Drying time varies depending on the type of nail polish and the thickness of the coats. It’s generally recommended to allow each coat to dry for at least 15-20 minutes.
5. How do I store washer nail polish jewelry?
Store washer nail polish jewelry in a dry, cool place away from direct sunlight to prevent fading and damage.
Conclusion:
Washer nail polish jewelry offers a delightful fusion of practicality, creativity, and sustainability. This accessible and affordable craft allows individuals to express their unique style while embracing the beauty of upcycling. By transforming ordinary washers into captivating adornments, individuals can celebrate their artistic talents and contribute to a more sustainable future. Whether creating statement earrings, charming bracelets, or unique necklaces, washer nail polish jewelry provides a platform for self-expression, creativity, and personal style.


Closure
Thus, we hope this article has provided valuable insights into The Enduring Appeal of Washer Nail Polish Jewelry: A Creative and Sustainable Craft. We appreciate your attention to our article. See you in our next article!